Connecting To Serial Console
Some devices come with a console interface, so even though connecting to a serial console is not the most common task, it’s useful to know how to do it. If you, for example, have a Raspberry, you might use a serial connection as well.
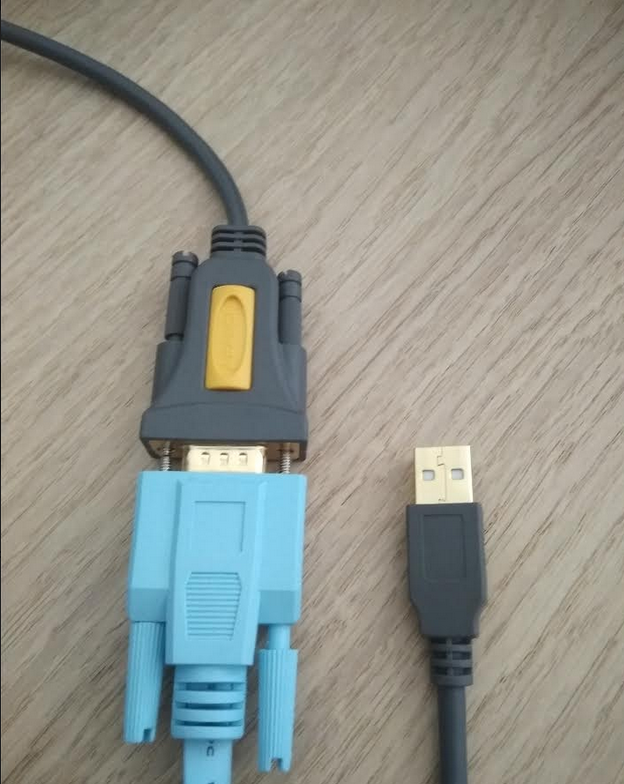
The only problem is how to plug that console interface to your laptop. For that, there’s usually a usb-serial adapter, it can look like this:

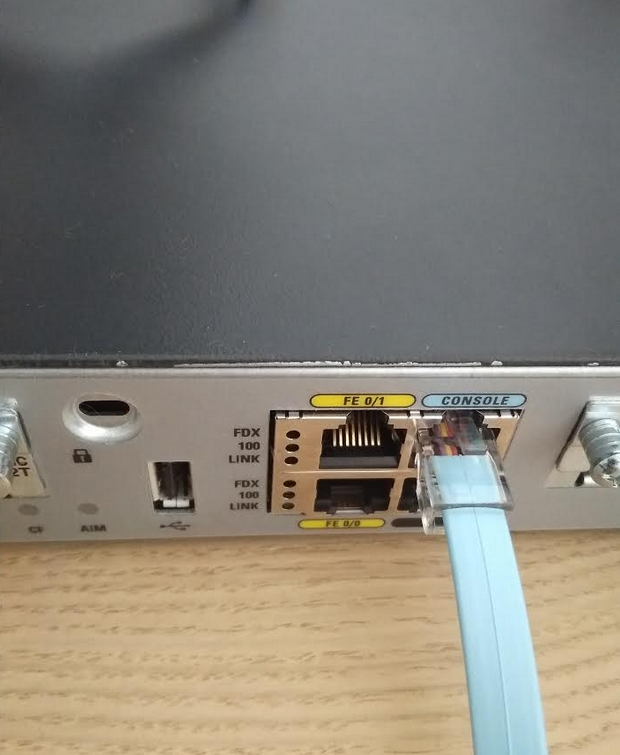
So the grey/black cable is exactly the usb-to-serial adapter. The blue cable is what gets connected to a console interface, e.g. to some router as in my example:

So step one is done, another minor trouble might be to get everything working. Under Windows, you actually might have a working setup at this point, all you need to do is find a serial interface amoung your devices (named something like COM1 or COM2, etc.) and use some software like Putty.
Under Linux, it’s basically just as easy, but you’ll also find out a bit more in the process because it might not work out of the box every single time. So from now on, I’ll show the basic steps that also might be used to troubleshoot what’s going on.
First, you need to find out if the usb-serial adapter has been recognised by the system and if so under what name you can access it.
A good start is to run the following command:
# dmesg | grep tty
the output of this could be actually pretty exhausting, but the point is that you’re looking for lines like these:
[10362.596974] usb 2-2: pl2303 converter now attached to ttyUSB0
[10369.634748] pl2303 ttyUSB0: pl2303 converter now disconnected from ttyUSB0
[10385.287049] usb 2-2: pl2303 converter now attached to ttyUSB0
These usb-serial adapters usually get a name like ttyUSB[0-9], so that’s what you’re looking for.
Another way how you can go about this step is to run lsusb that might give you a shorter output like this one:
Bus 001 Device 005: ID 0a5c:5804 Broadcom Corp. BCM5880 Secure Applications Processor with fingerprint swipe sensor
Bus 001 Device 004: ID 1bcf:2b8d Sunplus Innovation Technology Inc.
Bus 001 Device 003: ID 8087:0a2a Intel Corp.
Bus 001 Device 002: ID 8087:8001 Intel Corp.
Bus 001 Device 001: ID 1d6b:0002 Linux Foundation 2.0 root hub
Bus 003 Device 001: ID 1d6b:0003 Linux Foundation 3.0 root hub
Bus 002 Device 005: ID 067b:2303 Prolific Technology, Inc. PL2303 Serial Port
Bus 002 Device 001: ID 1d6b:0002 Linux Foundation 2.0 root hub
This is perhaps a bit more readable for humans, I can see that there’s this Prolific serial port, and I can see what usb it’s been plugged into.
Another good way of finding out is to unplug your usb-serial cable and run $ udevadm monitor -u, then plug in your cable, which causes udev to pick it up and report what’s going on:
onitor will print the received events for:
UDEV - the event which udev sends out after rule processing

UDEV  [11732.773615] add      /devices/pci0000:00/0000:00:14.0/usb2/2-2 (usb)
UDEV  [11732.776834] add      /devices/pci0000:00/0000:00:14.0/usb2/2-2/2-2:1.0 (usb)
UDEV  [11732.781164] add      /devices/pci0000:00/0000:00:14.0/usb2/2-2/2-2:1.0/ttyUSB0 (usb-serial)
UDEV  [11732.787421] add      /devices/pci0000:00/0000:00:14.0/usb2/2-2/2-2:1.0/ttyUSB0/tty/ttyUSB0 (tty)
UDEV  [11732.791264] bind     /devices/pci0000:00/0000:00:14.0/usb2/2-2/2-2:1.0/ttyUSB0 (usb-serial)
UDEV  [11732.792700] bind     /devices/pci0000:00/0000:00:14.0/usb2/2-2/2-2:1.0 (usb)
UDEV  [11732.802535] bind     /devices/pci0000:00/0000:00:14.0/usb2/2-2 (usb)
From here, I can easily see that ttyUSB0 is the name I’m looking for. I can then confirm that such a device has been added under /dev:
$ ls -l /dev/ttyUSB*
crw-rw---- 1 root uucp 188, 0 May 21 15:02 /dev/ttyUSB0
When we know where the device is and what’s its name, we need a software to connect to it. There’re a variety of different utilities you can use, if you’re using an Arch system, you can have a look at some here. Namely, you can use minicom, picocom, screen, serialclient, dterm, and more.
For its simplicity, I’ve been using picocom, that’s really simple, you just give it options and a device to connect to:
picocom [options] device
So I can be excplicit and specify options (boud rate, flow control, parity, stop, and data bits) and try it out:
 picocom -b 9600 -f n -y n -p 1 -d 8 /dev/ttyUSB0
picocom v3.1

port is        : /dev/ttyUSB0
flowcontrol    : none
baudrate is    : 9600
parity is      : none
databits are   : 8
stopbits are   : 1
escape is      : C-a
local echo is  : no
noinit is      : no
noreset is     : no
hangup is      : no
nolock is      : no
send_cmd is    : sz -vv
receive_cmd is : rz -vv -E
imap is        :
omap is        :
emap is        : crcrlf,delbs,
logfile is     : none
initstring     : none
exit_after is  : not set
exit is        : no

Type [C-a] [C-h] to see available commands
Terminal ready


User Access Verification

Password:
It seems everything’s been set up correctly since now I’ve been connected to my router. After filling in a password, I get my router’s interface:
router2>
Picocom uses Emacs-like key bindings, so in order to terminate the console interface, you need to type C-a C-x:
router2>
Terminating...
Thanks for using picocom
There’s actually one trouble you might encounter. And that’s permissions. As you can see in the output of ls:
$ ls -l /dev/ttyUSB*
crw-rw---- 1 root uucp 188, 0 May 21 15:02 /dev/ttyUSB0
this device can’t be just accessed by anyone. A good and quick solution is to add your user (yourself) into the uucp group (in my example):
# usermod -a -G uucp pavel
When I do this, I no longer need to run picocom as the root to be able to access the device (and therefore connect to the serial console of my device). You can confirm that your user has been added into the desired group by using id or groups command. I also advise you be a bit more careful with usermod command, one easy-to-make mistake is to run usermod -G (leaving out option -a that stands for “add”) which removes all secondary groups a user is currently part of and are not listed as a part of this command. So you can easily end up in a situation when you delete the user from a lot of groups.
That’s about everything for now. I’ve been messing up with my routers a bit these days, so I might bring more articles on this topic in the near future.